Here it is, your official walkthrough (part 2) of the Active Witness mobile app! This time we're going to focus on getting your facility up and running and will be useful information for our installation partners and superusers.
If you are a superuser/administrator of your facility's access and security, or you are an Active Witness installer, you'll need to know how to set up a facility. There are a couple of steps so let's get into it.
How to: Set up a facility - Step-by-step
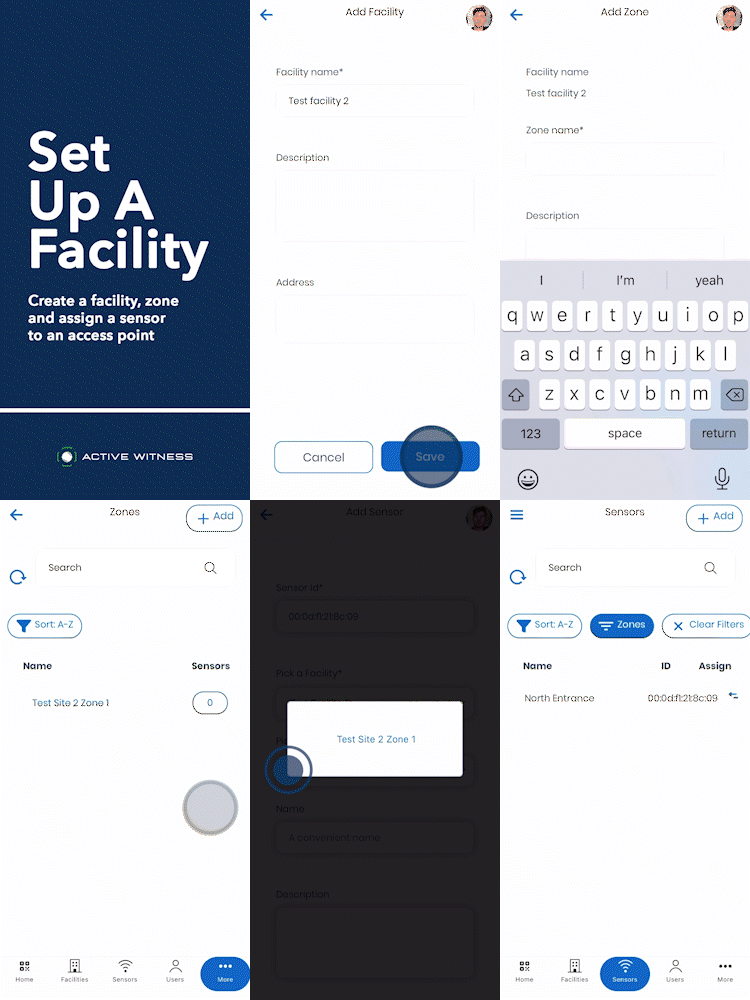
- Select the facilities tab and press "+ add"
- Type in your new facility Name and hit save
- Select the bubble corresponding to the number of 'zones' under your new facility (it should read 0 for a new facility), this will take you to the 'zones' tab
- From the 'zones' tab, select the "+ add" button and type in your new facility name, and hit the save button.
- Next, select the bubble corresponding to the number of 'sensors' assigned to your new 'zone' and hit "+add" to add a new sensor.
- Type in your new sensor's MAC Address (which can be found on the box of the device, or on the back of your Sima reader) and fill in the rest of the required information.
- Select the facility and zone you would like to assign your sensor to.
- Once you have added all the zones and assigned each sensor to an access point, voila! You're all set.
 👉
👉 
I bet you didn't think it would be this easy! Set up your access control system in just a few minutes with our mobile app or our desktop app.
If you would prefer to set up a facility using our web-based app, visit our walkthrough here.
Sometimes it's easier for us to just show you, if you're interested in a demo, you can book one here:

Other resources that may be helpful:
- FAQs page can be found here
- Mobile app walkthrough presentation can be found here
Alternatively, you can reach out to us directly by email at sima@activewitness.com or 👇


